Circuit recognition · Guide 01
Brands Hatch
West Kingsdown, Kent
Circuit data
Locked
Noise limits
Check your booking and briefing: event limits and test procedures can differ.
Layout
Grand Prix
Length
2.433 mi / 3.916 km
Direction
Clockwise
Access
Permanent circuit
Circuit brief
Know the lap
Character
Compact, undulating and technical, with blind crests and significant elevation change.
Corner by corner guide
10 corners on Grand Prix
Corner by corner guide
10 corners on Grand Prix
Grand Prix
The GP layout starts with everything that makes Brands Indy memorable, then heads out through Surtees into the fast, wooded back section. The pace changes quickly and the next bend is often out of sight, so it's a lap that rewards a clear plan and smooth inputs.
- 1
Paddock Hill Bend
Arriving along Brabham Straight, the shape of Paddock Hill disguises how quickly the circuit falls away after turn-in. It is tempting to chase the inside immediately, but the descent can leave you asking the front tyres to do too much while the exit opens downhill. A settled approach is worth more than a heroic entry: guide the car towards the inside, then let it travel downhill without making a second, abrupt steering correction. The next braking area climbs towards Druids, so the exit has to leave the car ready to stop in a straight line.
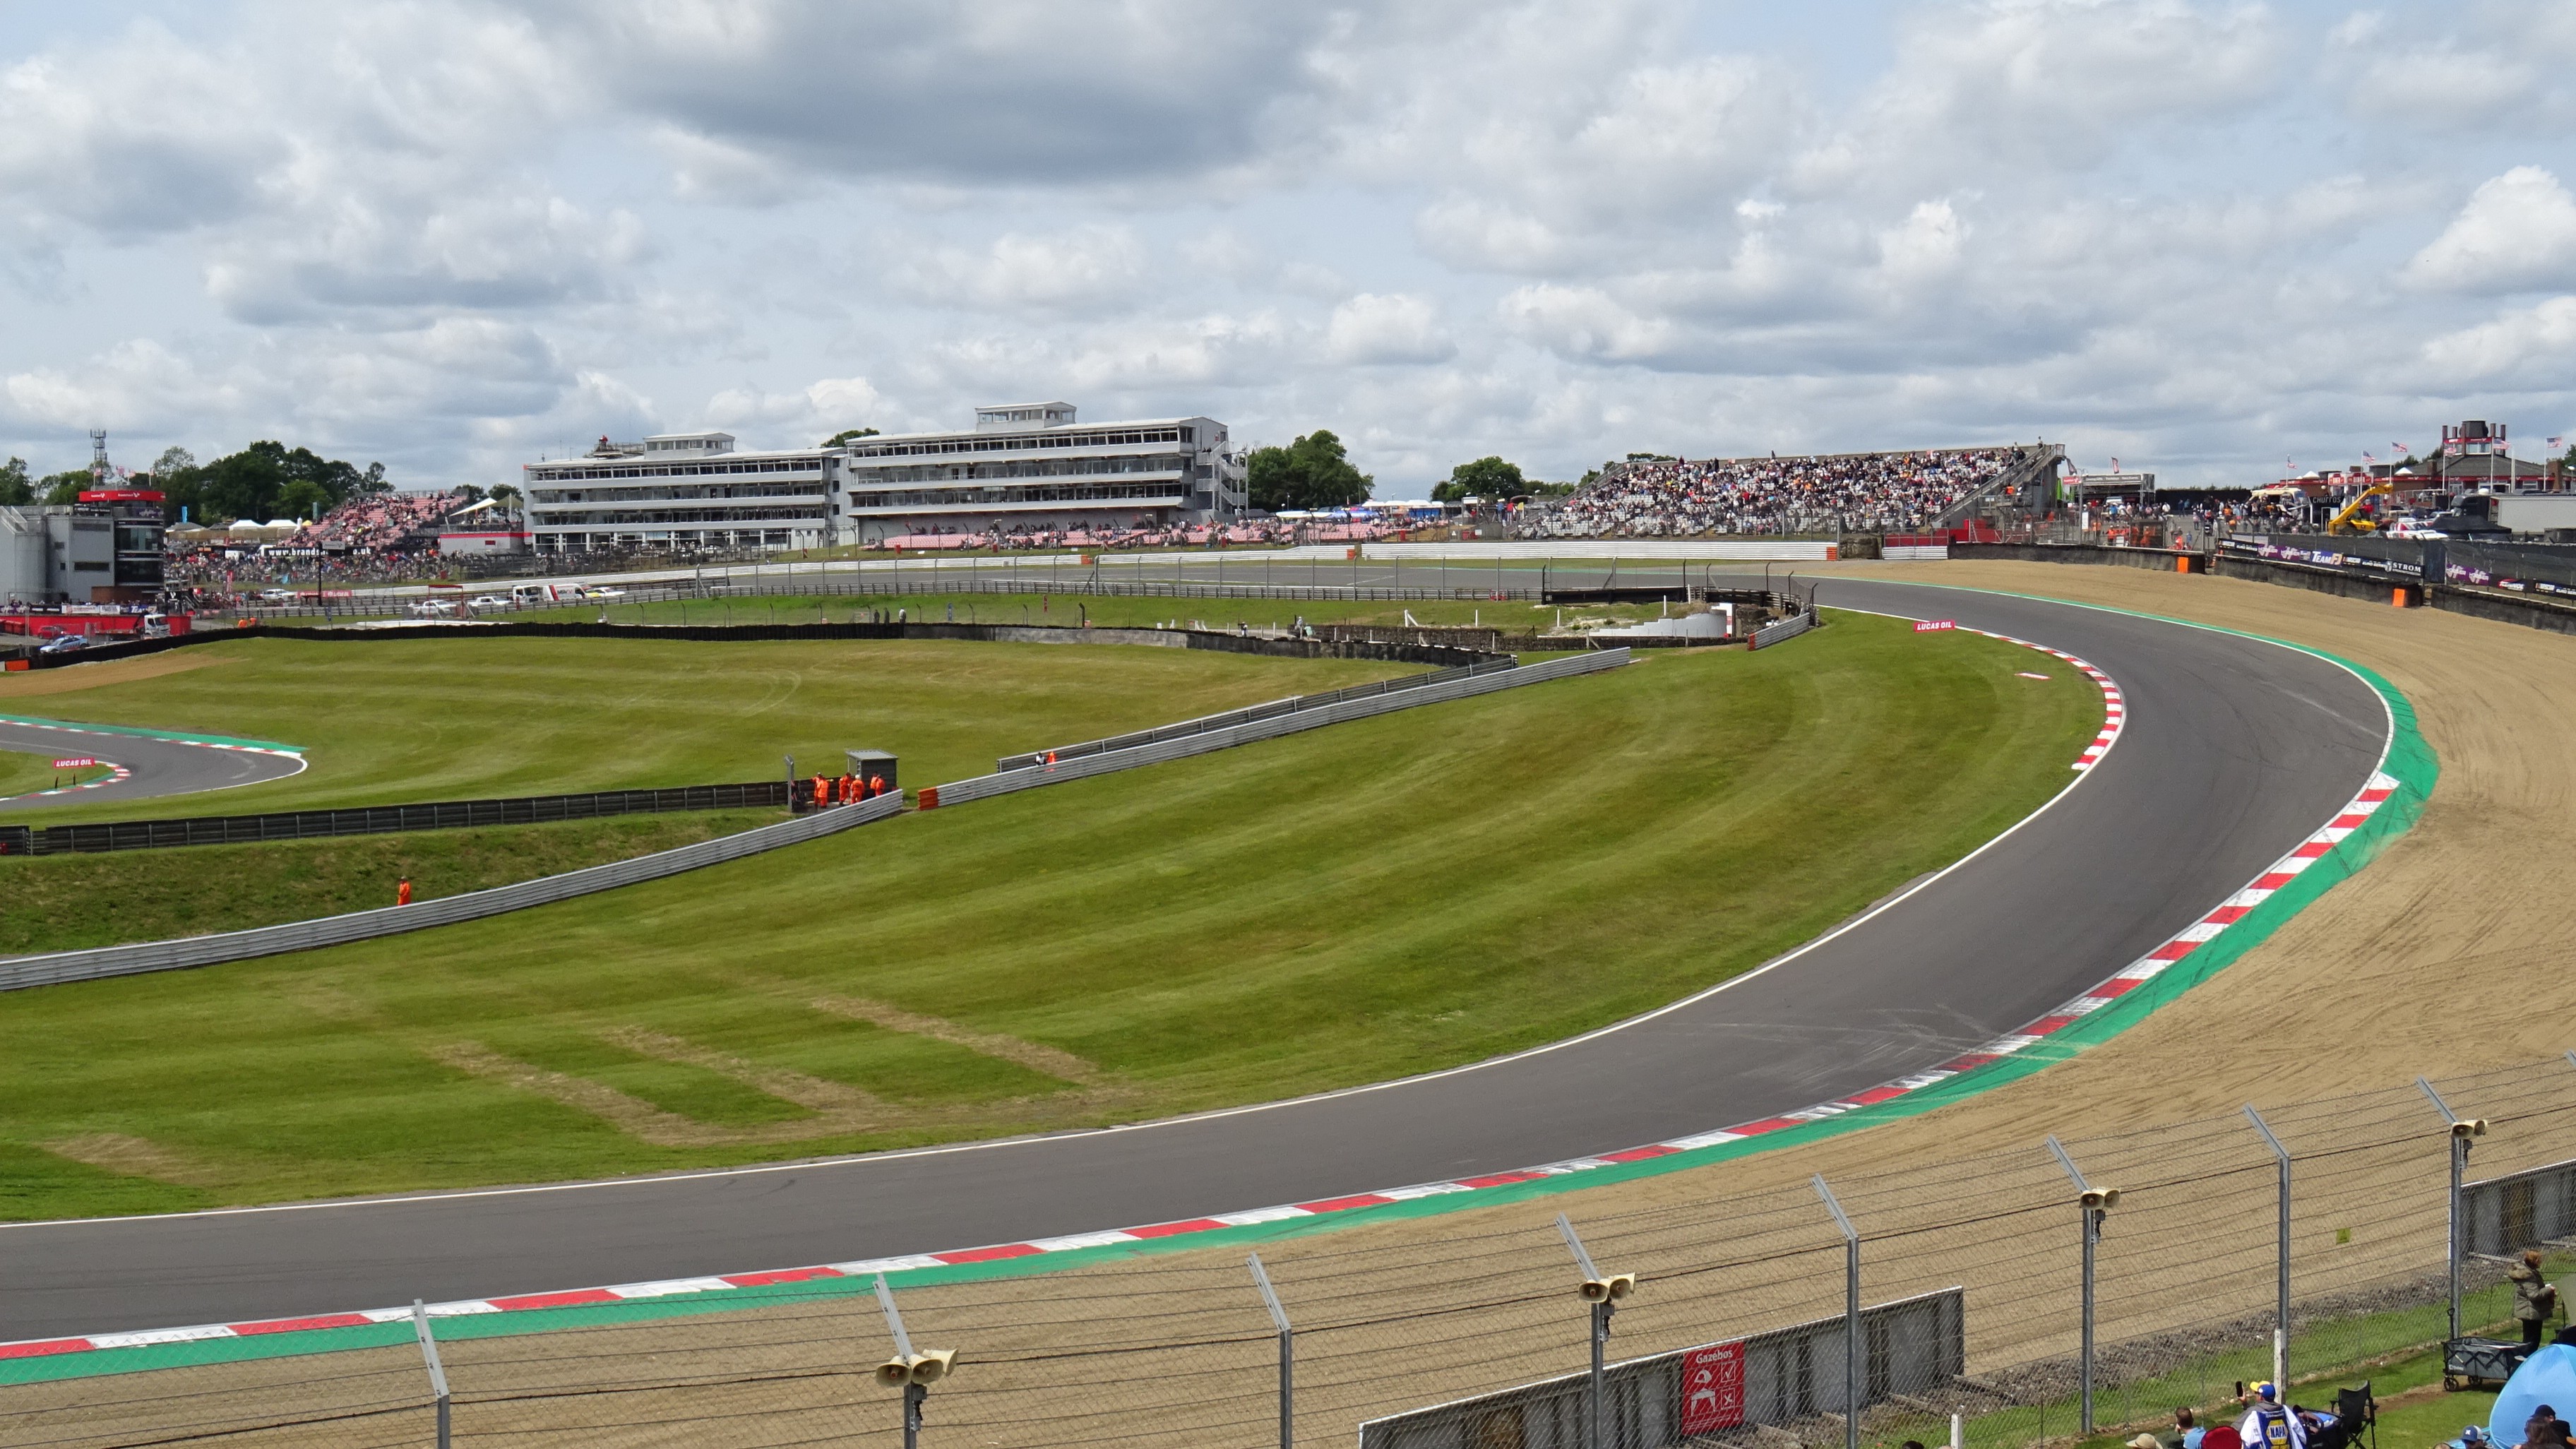
Photo: BWard 1997 · Paddock Hill Bend during American Speedfest 2025 · CC BY 4.0 - 2
Druids
The climb after Paddock changes the feeling of the brake pedal. Druids is tight and unusually easy to over-attack after such a fast downhill section. One observed approach deliberately avoids rushing to the first visible inside edge, then brings the car back towards the later part of the hairpin. Whichever shape suits the vehicle, the question is whether the car has finished rotating before you ask it to accelerate downhill. Watch the inside kerb and leave yourself a clean path towards Graham Hill Bend.
- 3
Graham Hill Bend
The run off Druids gives little time to place the car for the left-hander. Graham Hill is not just about finding the apex; it is about unloading the steering soon enough to drive onto Cooper Straight. The car can be moving downhill while you are still completing the turn, so a rushed throttle application tends to push the exit wide. Use the opening laps to distinguish a helpful kerb from one that interrupts traction, especially in a heavier road car.
- 4
Surtees
Surtees sends you off the Indy section and into the wooded GP loop. Approach from outside, bring the car in progressively and concentrate on getting clean drive down the next stretch. Going in too hot often means arriving at the exit with steering still wound on, which is the last thing you want before the GP section opens out.
- 5
Hawthorn Bend
After Pilgrims Drop the circuit feels much faster and more exposed, then Hawthorn arrives with less spare time than the map suggests. The GP coaching material describes this as a major commitment corner, but its particular braking marker and gear choices come from a simulator and must not be transferred to a track-day car. For a real lap, prioritise a predictable approach and a calm, progressive turn through the bend. What matters is being in control of the car before the next change of direction at Westfield.
- 6
Westfield Bend
Westfield comes after the fast Hawthorn section, and its exit starts setting the car up for Dingle Dell. An onboard driver uses a little inside kerb but warns that too much kerb on exit can pull the car away from the chosen line. Treat it as a placement corner: find the part of the inside that the car can accept without a jolt, let it breathe towards the outside and have the steering settled before the road narrows visually again.
- 7
Sheene Curve
The Dingle Dell approach feeds into a bend whose shape is not fully apparent from the driver's seat. In the live lap the driver concentrates on keeping the car composed and making one clear turn-in through Sheene, rather than several small corrections. That is the useful lesson here: decide on the line early, keep your eyes well ahead and avoid making a late steering demand simply because the apex appears later than expected. The usable kerb varies with vehicle and the event's track limits.
- 8
Stirling's Bend
Sheene leads almost straight into Stirling’s. You need to slow the car, bring it towards the inside and make sure it is facing down the next straight before pressing hard on the throttle. There is little room for a last-second correction, so give yourself a clear braking and turn-in point.
- 9
Clearways
On the Indy layout, Clearways brings you back towards the pit straight and sets up the next lap. Come into the long right with the car balanced, then begin feeding in the throttle as the corner opens. Go in too quickly and you will be hanging onto steering lock, waiting for the moment you can actually accelerate. The clean exit is worth much more than a rushed entry.
- 10
Clark Curve
Clark Curve completes the long right-hand exit and brings the pit straight into view. This is where an earlier mistake at Clearways becomes expensive: if you are still fighting steering angle here, accelerating simply asks the front tyres to do two jobs at once. Allow the car to unwind onto Brabham Straight, stay conscious of the pit wall and leave enough room for traffic. A tidy final section rewards the whole lap more than a single dramatic apex.
A guide, not tuition. These corner notes are here to help you get to know the circuit, not to replace a track briefing or advice from a qualified instructor. Lines, braking points and kerb use vary with your vehicle, experience and conditions on the day. Treat the suggestions as a starting point, build up at your own pace and always follow the flags, marshals and organiser’s instructions.
Trackday note
GP and Indy days feel very different; check the organiser’s joining instructions before relying on a layout.
Suitable for
Bikes · Cars
Circuit centreline derived from © OpenStreetMap contributors (ODbL). Layout visual is a navigation aid, not a safety or briefing document. Always follow the organiser and circuit marshals.
Private track journal
Personal notes
Sign in to rate this circuit and keep notes for your next visit.
Trackday tools
Log setups, tyre pressures and get paddock SOS help