Circuit recognition · Guide 01
Cadwell Park
Louth, Lincolnshire
Circuit data
Locked
Noise limits
Check your booking and briefing: event limits and test procedures can differ.
Layout
Bike candidate
Length
2.19 mi / 3.52 km
Direction
Clockwise
Access
Permanent circuit
Circuit brief
Know the lap
Character
A narrow, technical circuit with major elevation changes and little room for error.
Corner by corner guide
11 corners on Full circuit (motorcycles)
Corner by corner guide
11 corners on Full circuit (motorcycles)
Full circuit (motorcycles)
Cadwell Park is narrow, hilly and full of character. The changes in height make familiar braking and turn-in points feel different, while sections such as the Mountain need a clear plan before you arrive. This is a bike-focused walkthrough, not advice to copy another rider's pace.
- 1
Coppice
Coppice opens the lap with a fast right and a sense that the track is narrower than the map suggested. Give the bike time to settle at lean, because you soon need to aim through the paired Charlie’s bends rather than simply drifting outside.
- 2
Charlie’s, first
The first Charlie’s right sets up a second tightening movement. From the saddle the important cue is how much room you still have to finish the direction change without adding an abrupt steering input.
- 3
Charlie’s, second
The second part of Charlie’s releases you onto Park Straight. If you reach it already running out of road, the whole run to Park Corner suffers; a slightly calmer opening turn can be the better bargain.
- 4
Park Corner
After the straight, Park changes the rhythm with a proper right-hand corner. The main difficulty is the contrast between the long approach and the amount of road you can use once leaning, so build reference points progressively.
- 5
Chris Curve
Chris Curve is an extended right where you can spend a long time holding the machine at lean. The temptation is to move early for Gooseneck; instead judge the release so the bike is upright and ready for the sharp downhill change.
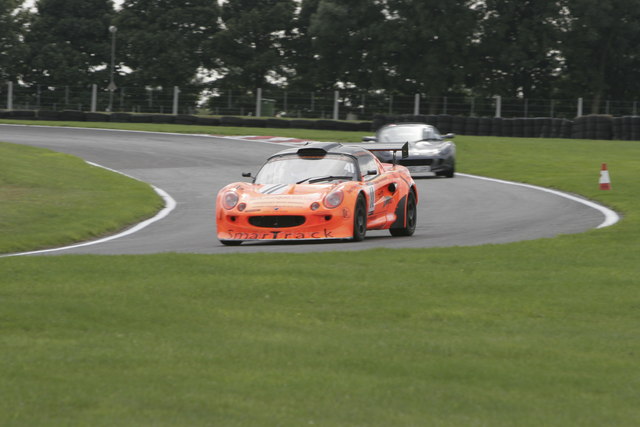
Photo: Alan Butcher · Cars rounding Chris Curve at Cadwell Park · CC BY-SA 2.0 - 6
Gooseneck
Gooseneck is the corner many riders remember: the road flicks from one side to the other and then falls away. You want the bike prepared for the drop rather than discovering you still need to turn hard as the suspension unloads.
- 7
Mansfield
Mansfield comes after a downhill run and demands genuine speed reduction before a tight left. The gradient can alter your braking confidence; it is better to finish the main work with the bike stable than to import a car’s late-braking line.
- 8
The Mountain
The Mountain is as much about how the bike settles over a crest as about the bend itself. Resist trying to imitate a race-bike wheelie: a track-day line should leave the machine stable and steerable when you need the next input.
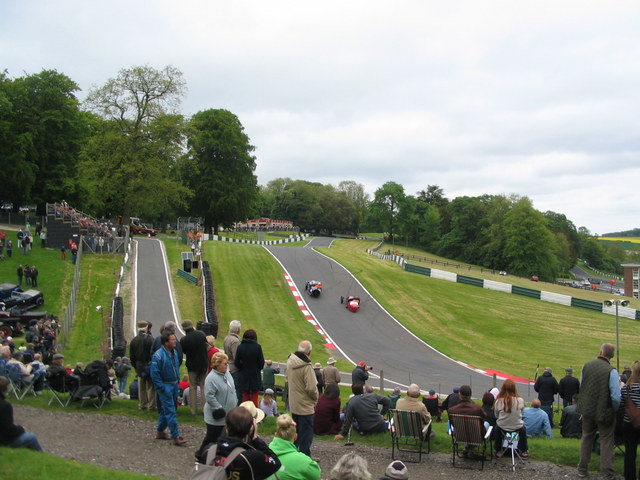
Photo: E Gammie · The Mountain at Cadwell Park · CC BY-SA 2.0 - 9
Hall Bends
Hall Bends are a rapid sequence of direction changes after the Mountain. A bike needs time to transfer lean from side to side, so the smoothness of the first transition decides how much room remains for the last one.
- 10
Hairpin
The tight Hairpin is a complete change of pace after Hall Bends. A patient entry gives the bike time to stand up before the drive to Barn; forcing the turn on a narrow line simply makes the exit more difficult.
- 11
Barn
Barn is the right that leads back onto the start-finish straight. If you are still leaned over heavily when you want to accelerate, the error probably started at the Hairpin: set the line up early and let the bike open its radius.
A guide, not tuition. These corner notes are here to help you get to know the circuit, not to replace a track briefing or advice from a qualified instructor. Lines, braking points and kerb use vary with your vehicle, experience and conditions on the day. Treat the suggestions as a starting point, build up at your own pace and always follow the flags, marshals and organiser’s instructions.
Trackday note
Bike and car layouts differ around the Mountain section; use the organiser’s marked plan.
Suitable for
Bikes · Cars
Circuit centreline derived from © OpenStreetMap contributors (ODbL). Layout visual is a navigation aid, not a safety or briefing document. Always follow the organiser and circuit marshals.
Private track journal
Personal notes
Sign in to rate this circuit and keep notes for your next visit.
Trackday tools
Log setups, tyre pressures and get paddock SOS help